zsh安装

如果你用 Mac,就可以直接看下一节
如果你用 Redhat Linux,执行:sudo yum install zsh
如果你用 Ubuntu Linux,执行:sudo apt install zsh
如果你用 OpenWrt,执行opkg updateopkg install zsh install oh-my-zsh
如果你用 Windows……去洗洗睡吧。

安装完成后设置当前用户使用 zsh:chsh -s /bin/zsh,根据提示输入当前用户的密码就可以了。
chsh -s /bin/bash可以修改为默认配置

oh-my-zsh

oh-my-zsh可能会影响速度,所以,可以不安装,如果不安装,插件的安装,建议使用”一步安装“

安装oh my zsh可以自动安装也可以手动安装。

自动安装:

1
2
3
4
5
# 国外
wget https://github.com/robbyrussell/oh-my-zsh/raw/master/tools/install.sh -O - | sh
# 国内
wget https://gitee.com/mirrors/oh-my-zsh/raw/master/tools/install.sh -O - | sh

OpenWrt安装zsh:

可能需要安装依赖opkg install wget unzip ca-certificates给Openwrt安装oh-my-zsh

1
2
3
4
5
6
sh -c "$(curl -fsSL https://raw.githubusercontent.com/felix-fly/openwrt-ohmyzsh/master/install.sh)"

# 修改默认终端为zsh
which zsh && sed -i -- 's:/bin/bash:'`which zsh`':g' /etc/passwd
# 还原为默认终端
# 将/etc/passwd 文件中的zsh修改为bash

手动安装:

1
2
git clone git://github.com/robbyrussell/oh-my-zsh.git ~/.oh-my-zsh
cp ~/.oh-my-zsh/templates/zshrc.zsh-template ~/.zshrc
1
2
3
wget https://gitee.com/mirrors/oh-my-zsh/raw/master/tools/install.sh
chmod +x install.sh
sh install.sh

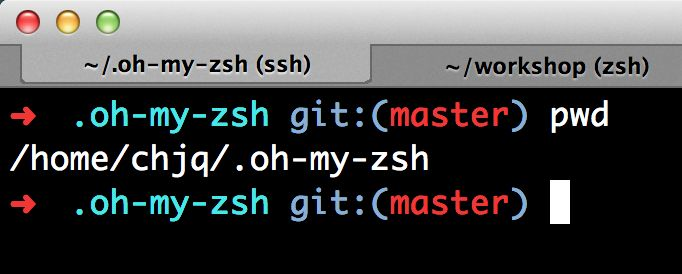
都不复杂,安装完成之后退出当前会话重新打开一个终端窗口,你就可以见到这个彩色的提示了:

推荐配置

1
2
3
4
ZSH_THEME="rkj-repos"
ZSH_THEME="agnoster" # (this is one of the fancy ones)
source $ZSH/oh-my-zsh.sh
plugins=(git history vscode sublime sudo zsh-syntax-highlighting zsh-autosuggestions autojump)

主题安装

zsh内置主题效果预览

Powerlevel10k

可以选择pure主题

1
2
3
git clone --depth=1 https://gitee.com/romkatv/powerlevel10k.git ~/.zsh/plugins/powerlevel10k
echo 'source ~/.zsh/plugins/powerlevel10k/powerlevel10k.zsh-theme' >>~/.zshrc
source ~/.zshrc
  • p10k configure

安装Hack Nerd字体

  • VSCode字体设置
1
Hack Nerd Font Mono, Monaco, 'Courier New', monospace

Pure

官网:https://github.com/sindresorhus/pure

建议通过使用Powerlevel10k安装

1
2
3
4
5
brew install node
brew install pure
git clone https://gitee.com/URmyLucky/pure2020.git ~/.zsh/plugins/pure
echo "source ${(q-)PWD}/.zsh/plugins/pure/pure.zsh" >> ${ZDOTDIR:-$HOME}/.zshrc
source ~/.zshrc

.zshrc文件中添加

1
2
autoload -U promptinit; promptinit
prompt pure

必备插件安装

Openwrt不支持从库拉取,可以从其他终端上直接拷贝上传。

  • Git
1
2
3
git clone https://github.com/zsh-users/zsh-syntax-highlighting.git ${ZSH_CUSTOM:-~/.oh-my-zsh/custom}/plugins/zsh-syntax-highlighting
git clone https://github.com/zsh-users/zsh-autosuggestions ${ZSH_CUSTOM:-~/.oh-my-zsh/custom}/plugins/zsh-autosuggestions

  • gitee
1
2
3
4
5
6
git clone https://gitee.com/conansteve/zsh-syntax-highlighting.git ${ZSH_CUSTOM:-~/.oh-my-zsh/custom}/plugins/zsh-syntax-highlighting
git clone https://gitee.com/conansteve/zsh-autosuggestions.git ${ZSH_CUSTOM:-~/.oh-my-zsh/custom}/plugins/zsh-autosuggestions

git clone https://gitee.com/conansteve/zsh-syntax-highlighting.git ~/.oh-my-zsh/custom/plugins/zsh-syntax-highlighting
git clone https://gitee.com/conansteve/zsh-autosuggestions.git ~/.oh-my-zsh/custom/plugins/zsh-autosuggestions

  • 修改配置文件
1
plugins=(git sudo zsh-syntax-highlighting zsh-autosuggestions autojump)
  • autojump
1
2
brew install autojump
sudo apt install autojump

总结

linux环境安装

  • 执行
1
2
3
git clone https://gitee.com/conansteve/zsh-syntax-highlighting.git ${ZSH_CUSTOM:-~/.oh-my-zsh/custom}/plugins/zsh-syntax-highlighting
git clone https://gitee.com/conansteve/zsh-autosuggestions.git ${ZSH_CUSTOM:-~/.oh-my-zsh/custom}/plugins/zsh-autosuggestions
sudo apt install autojump
  • 修改配置文件
1
plugins=(git sudo zsh-syntax-highlighting zsh-autosuggestions autojump)

安装自动补全功能

方法一

使用 zsh 我认为第一个吸引我的重要插件就是 zsh-autosuggestions。它会自动为你的终端命令提供补全建议,让你能更加快速的完成命令输入,有了它,你再也不用一遍遍的按 tab 来加快你的命令输入了。

zsh-autosuggestions 安装文档你可以点击这个链接 进入查看,比如使用 Git 安装步骤如下:

使用 Git 把项目从仓库 Clone 下来:

1
2
3
git clone https://github.com/zsh-users/zsh-autosuggestions ~/.zsh/plugins/zsh-autosuggestions

echo "source ${ZDOTDIR:-$HOME}/.zsh/plugins/zsh-autosuggestions/zsh-autosuggestions.zsh" >> ${ZDOTDIR:-$HOME}/.zshrc

或者手动将以下内容添加到 .zshrc 文件内:

1
source ~/.zsh/plugins/zsh-autosuggestions/zsh-autosuggestions.zsh

生效:

1
source ~/.zshrc

重新开启终端会话,你就可以享受 zsh-autosuggestions 给你带来的便利了。

一步安装:
1
2
3
4
5
6
7
8
git clone https://github.com/zsh-users/zsh-autosuggestions ~/.zsh/plugins/zsh-autosuggestions
echo "source ${ZDOTDIR:-$HOME}/.zsh/plugins/zsh-autosuggestions/zsh-autosuggestions.zsh" >> ${ZDOTDIR:-$HOME}/.zshrc
source ~/.zshrc

//gitee
git clone git@gitee.com:lhaisu/zsh-autosuggestions.git ~/.zsh/plugins/zsh-autosuggestions
echo "source ${ZDOTDIR:-$HOME}/.zsh/plugins/zsh-autosuggestions/zsh-autosuggestions.zsh" >> ${ZDOTDIR:-$HOME}/.zshrc
source ~/.zshrc

方法二:推荐

  1. 把插件仓库克隆到$ZSH_CUSTOM/plugins (默认位置是 ~/.oh-my-zsh/custom/plugins)
1
2
3
4
git clone https://github.com/zsh-users/zsh-autosuggestions ${ZSH_CUSTOM:-~/.oh-my-zsh/custom}/plugins/zsh-autosuggestions

git clone https://gitee.com/zjy_1671/zsh-syntax-highlighting.git ${ZSH_CUSTOM:-~/.oh-my-zsh/custom}/plugins/zsh-syntax-highlighting

  1. 设置~/.zshrc,把zsh-autosuggestions添加到 Oh My Zsh 要加载的插件列表中
1
plugins=(git zsh-autosuggestions)
  1. 使配置生效
    1
    source ~/.zshrc

语法高亮插件

安装zsh-syntax-highlighting语法高亮插件

官网:https://github.com/zsh-users/zsh-syntax-highlighting

方法一:一步安装:

1
2
3
4
5
6
7
git clone https://github.com/zsh-users/zsh-syntax-highlighting.git ~/.zsh/plugins/zsh-syntax-highlighting
echo "source ${ZDOTDIR:-$HOME}/.zsh/plugins/zsh-syntax-highlighting/zsh-syntax-highlighting.zsh" >> ${ZDOTDIR:-$HOME}/.zshrc
source ~/.zshrc
//gitee
git clone git@gitee.com:jklash1996/zsh-syntax-highlighting.git ~/.zsh/plugins/zsh-syntax-highlighting
echo "source ${ZDOTDIR:-$HOME}/.zsh/plugins/zsh-syntax-highlighting/zsh-syntax-highlighting.zsh" >> ${ZDOTDIR:-$HOME}/.zshrc
source ~/.zshrc

方法二:推荐

自动跳转插件autojump

地址:https://github.com/wting/autojump

它的用法是输入 j 目录名j 目录名包含的字符(这个目录必须是之前 cd 访问过的),就可直接切换到相应的目录。不用再各种cd啦~具体看下面截图示例。

Mac安装

1
brew install autojump

Add the following line to your ~/.bash_profile or ~/.zshrc file:
[ -f /opt/homebrew/etc/profile.d/autojump.sh ] && . /opt/homebrew/etc/profile.d/autojump.sh
If you use the Fish shell then add the following line to your ~/.config/fish/config.fish:
[ -f /opt/homebrew/share/autojump/autojump.fish ]; and source /opt/homebrew/share/autojump/autojump.fish
Restart your terminal for the settings to take effect.

Linux、Openwrt 一步安装

首先下载 autojump 源码

1
2
3
4
5
6
7
8
git clone git@github.com:wting/autojump.git ~/.oh-my-zsh/custom/plugins/autojump
cd ~/.oh-my-zsh/custom/plugins/autojump
./install.py

# 新版本直接在插件里面添加即可
echo "[[ -s ~/.autojump/etc/profile.d/autojump.sh ]] && source ~/.autojump/etc/profile.d/autojump.sh" >> ${ZDOTDIR:-$HOME}/.zshrc

source ~/.zshrc

国内源

1
2
3
4
5
6
7
8
9
git clone git@gitee.com:gentlecp/autojump.git ~/.zsh/plugins/autojump

cd ~/.zsh/plugins/autojump

./install.py

echo "[[ -s ~/.autojump/etc/profile.d/autojump.sh ]] && source ~/.autojump/etc/profile.d/autojump.sh" >> ${ZDOTDIR:-$HOME}/.zshrc

source ~/.zshrc

安装完成后,使用查看autojump版本。

1
2
$ autojump --version
autojump release-v21.1.2

设置.zshrc文件,添加autojump 配置

colorls

官网:https://github.com/athityakumar/colorls

homebrew安装:

1
2
brew install ruby
sudo gem install colorls

如果显示zsh: command not found: colorls
.zshrc里面添加export PATH=$PATH:$(ruby -e 'puts Gem.bindir')

WSL apt安装

1
2
sudo apt install ruby-dev  //切记用官方源,阿里云源会出问题,会出错,其他源暂时没试过
sudo gem install colorls

MacOS 13.6源码安装:

安装ruby(version>2.5) https://www.ruby-lang.org/en/downloads/

源码安装ruby

https://blog.csdn.net/baidu_38432732/article/details/106573806

1
2
3
4
5
6
./configure --prefix=/usr/local/ruby-3.0.3
sudo make
sudo make install
esource ~/.zshrc
ruby -v
gem install colorls

如果安装colorls失败,需要安装openssl,命令为brew install openssl@1.1

1
2
3
4
5
6
7
8
9
10
11
12
13
14
./config --prefix=/usr/local/opt/openssl/
sudo make
sudo make install
cd ~/Desktop/ruby-2.7.5/

//下面功能都是生成makefile
./configure --prefix=/usr/local/opt/ruby-2.7.5 --with-openssl-dir=/usr/local/opt/openssl
./configure --prefix=/usr/local/opt/ruby-2.7.5 --with-openssl-include=/usr/local/opt/openssl/include/ --with-openssl-lib=/usr/local/opt/openssl/lib
//测试成功
cd ./ext/openssl/
ruby extconf.rb --prefix=/usr/local/opt/ruby-2.7.5 --with-openssl-include=/usr/local/opt/openssl/include/ --with-openssl-lib=/usr/local/opt/openssl/lib
//end
sudo make
sudo make install

将下面代码添加进.zshrc文件中

1
2
3
4
export RUBY_HOME=/usr/local/opt/ruby-2.7.5
export PATH=$RUBY_HOME/bin:$PATH
export LDFLAGS=“RUBY_HOME/lib”
export CPPFLAGS=“RUBY_HOME/include”

colorls别名配置文件

1
2
3
4
5
6
7
8
9
10
11
12
13
14
15
16
# colorls别名start
# --sd 排序
# --gs git状态 Shows git status for each entry
# -r(or) --report 显示报告
# -d (or) --dirs : Shows only directories
# -f (or) --files : Shows only files
# -h (or) --help : Prints a very helpful help menu
# --sd (or) --sort-dirs or --group-directories-first : Shows directories first, followed by files
alias l='colorls --sd --gs'
alias la='colorls -A --sd --sf --gs --group-directories-first'
alias ll='colorls -lh --gs --group-directories-first'
alias lla='colorls -lhA --sd --sf --gs --group-directories-first'
alias lt="colorls --tree=1"
alias lt2="colorls --tree=2"
alias lsp='colorls -pl'
# colorls别名end

其他插件

1
plugins=(git history vscode sublime sudo)
  • vscode
  • Sublime
  • Sudo

Hyper

安装方法

  1. 通过Macwk网站安装
  2. MacOS可通过homebrew安装 brew install hyper
  3. 官网下载

配置

1
2
3
4
copyOnSelect: true,//自动复制被选择区域
shell: 'zsh',
fontFamily: 'Hack Nerd Font Mono, "DejaVu Sans Mono", Consolas, "Lucida Console", monospace',//MacOS https://www.nerdfonts.com/font-downloads
"editor.fontFamily": "Hack Nerd Font Mono,Lucida Console, ' Lucida Console', Lucida Console,", //windows

这里我们会用到两个插件:

  • hyper-snazzy:提供终端颜色主题
  • hyper-transparent-dynamic:提供终端窗口毛玻璃半透明效果

具体配置代码如下:

1
plugins: ["hyper-snazzy", "hyper-transparent-dynamic", "hyperpower","hyper-pane"]

窗口透明度调整

同样是在 Hyper 的配置文件中,添加如下代码:

1
2
3
hyperTransparentDynamic: {
alpha: 0.5 // 默认 50% 透明度
},//节点config的子节点

主题

1
2
hyper i hyper-npm-theme
hyper i verminal

image (1642×986) (hyper.is)

iterm2

Mac终端工具iTerm2的多个ssh链接保存设置(类似Xshell的使用方法)

别名配置

通用必备配置

1
2
3
4
5
6
7
8
9
10
11
12
13
14
15
16
17
18
19
20
21
22
23
24
25
26
27
28
29
30
31
32
33
34
35
36
37
38
39
40
41
42
43
44
45
46
47
48
49
50
51
52
53
54
55
#git 别名
alias gta="git add ."
alias gtam="git add . && git commit -m"
alias gtb="git branch"
alias gtbd="git branch -d"
alias gtck="git checkout"
alias gtcl="git clone"
alias gtm="git commit -m"
alias gtl="git log --graph --all"
alias gtlo="git log --oneline --graph --all"
# cancel last add
alias gtr="git reset HEAD"
# cancel last commit and add,慎用,会删除本地文件的修改
alias gtrh="git reset --hard HEAD^"
# cancel last commit
alias gtrs="git reset --soft HEAD^"
# 取消提交,可以先gtrs,再gtr
alias gtps="git push"
alias gts="git status"
alias gtst="git stash"

# convert web page to markdown
alias cm="clean-mark"

alias src="source ~/.zshrc"
alias strc="subl ~/.zshrc"
alias als="alias"
alias alsg="alias |grep"

# convert jupyter notebook to markdown
alias nb2md="jupyter nbconvert --to markdown"

# conda alias
alias cda="conda activate"
alias cdd="conda deactivate"
alias cdel="conda env list"

# hexo theme
alias hxcg="hexo clean && hexo g"
alias hxcgs="hexo clean && hexo g && hexo server"
alias hxs="hexo server"
alias hxd="hexo deploy"

alias ztc="zerotier-cli"

# yt-dlp start
alias ytd="yt-dlp"
alias ytdF="yt-dlp -F"
alias ytdf="yt-dlp -o /mnt/sda1/Documents/Downloads/youtube/'%(title)s.mp4'"
alias ytdl="yt-dlp -f 'bv[ext=mp4]+ba[ext=m4a]' --embed-metadata --merge-output-format mp4 -o /mnt/sda1/Documents/Downloads/youtube/'%(title)s.mp4'"
# yt-dlp end

# 解决Termius中文乱码
export LANG=en_US.UTF-8

macOS独有

1
2
#端口测试 telnet 192.68.1.101 80
alias telnet="nc -vz -w 2 "

其他配置

1
2
3
4
5
6
7
8
9
10
11
12
13
14
15
16
17
18
19
# 普通别名,无法配置colorls时使用
# -a 显示所有文件及目录 (. 开头的隐藏文件也会列出)
# -d 只列出目录(不递归列出目录内的文件)。
# -l 以长格式显示文件和目录信息,包括权限、所有者、大小、创建时间等。
# -r 倒序显示文件和目录。
# -t 将按照修改时间排序,最新的文件在最前面。
# -A 同 -a ,但不列出 "." (目前目录) 及 ".." (父目录)
# -F 在列出的文件名称后加一符号;例如可执行档则加 "*", 目录则加 "/"
# -R 递归显示目录中的所有文件和子目录。
# -h 文件大小以人类易读的单位显示。
alias l='ls -CF'
alias la='ls -AF'
alias lsa='ls -AF'
alias ll='ls -lhF'
alias lla='ls -lhAF'
alias lsp='ls -plh'
alias lt='ls -lhtF'
alias lat='ls -lhatF'
# End

windows terminal

Reference

  1. 终极 Shell——ZSH
  2. 玩转终端软件 Hyper
  3. 打造高颜值终端——Hyper
  4. zsh 命令自动补全插件 zsh-autosuggestions 安装和配置
  5. Linux 懒人工具 - autojump
  6. Mac终端窗口配置oh-my-zsh
  7. Windows Terminal 美化配置
  8. 打造最强终端之一:Fish shell简明教程
  9. 国内安装zsh教程